
What you need to know
Workflow
-
A User must register and accept the Privacy Policy.
-
Make your data sets to import (e.g. Metadata and either EM data tables or generic data)
-
To upload Campaign data, in the menu bar click on Data, then click on “Create a New Campaign” (see blue box in Figure 2).
 Figure 2. Create a New Campaign
 -
A modal window will open (Figure 3).
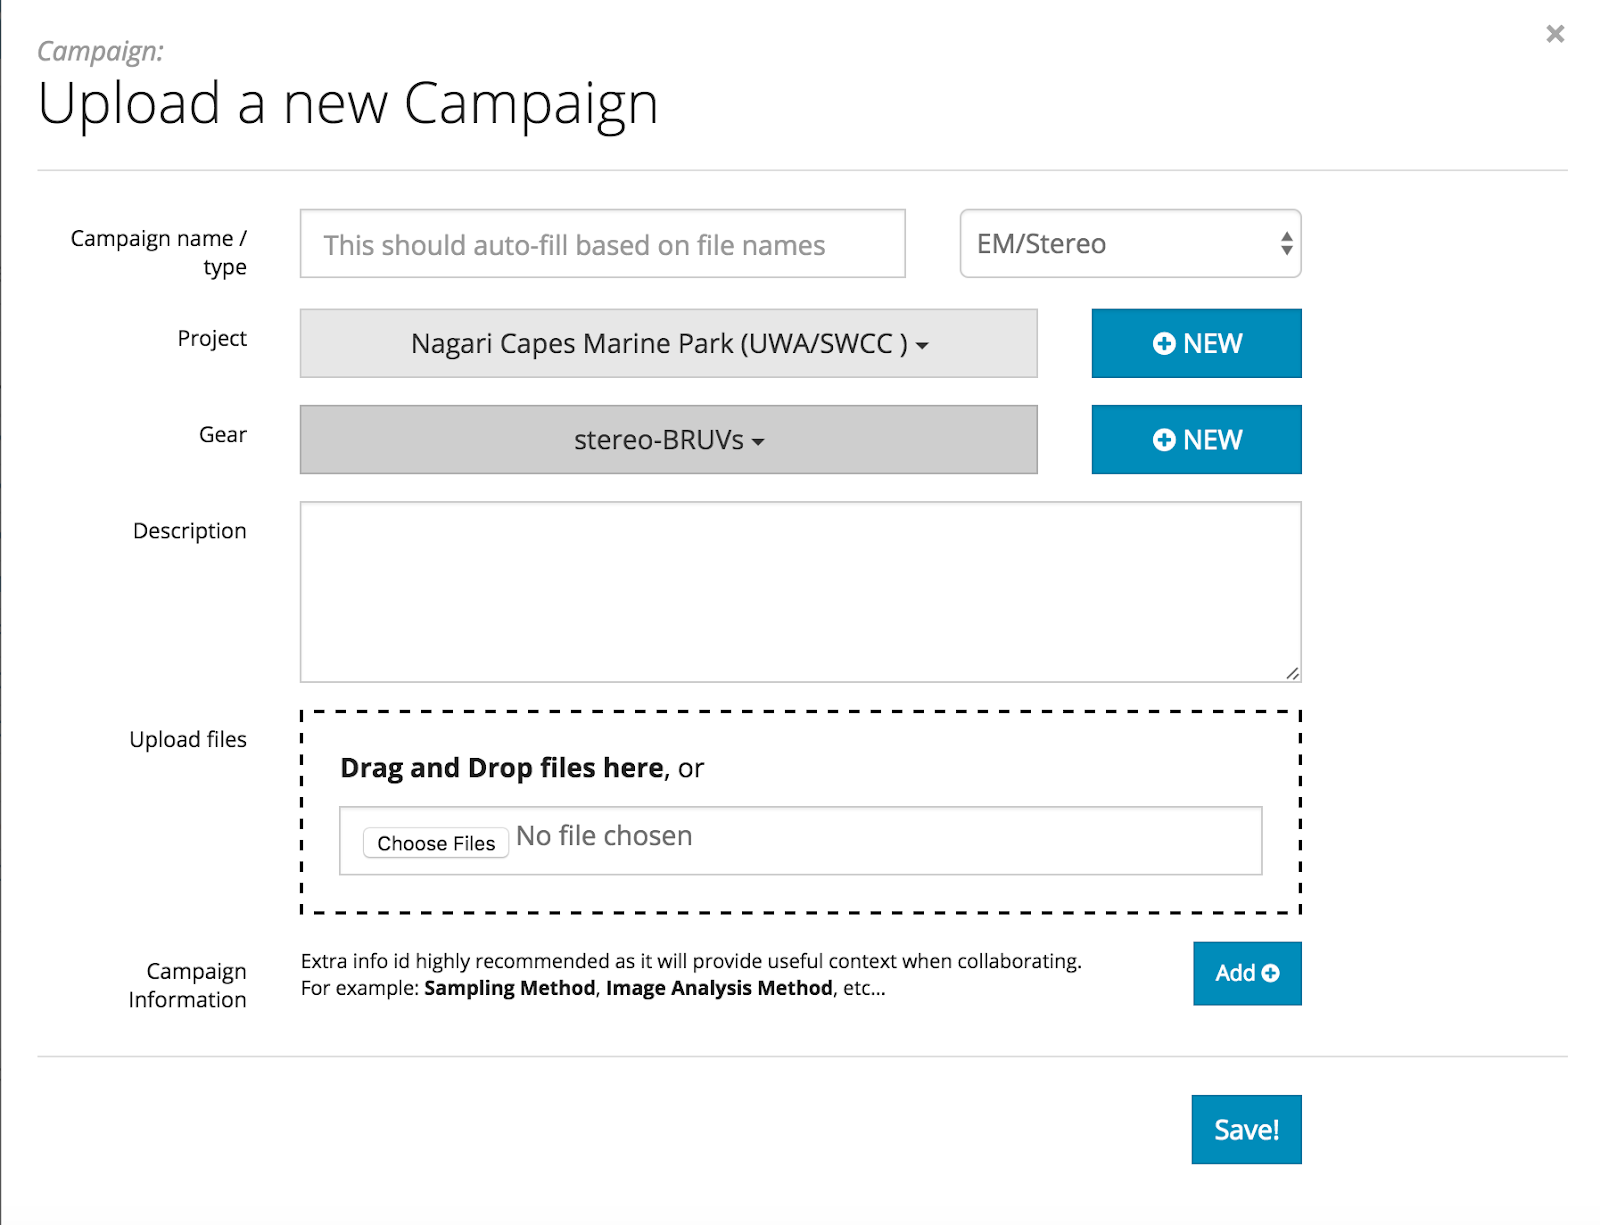
Figure 3. Modal window showing options for Uploading a new Campaign - The upload type of datatables must be specified, either:
- General: generic annotation files (e.g. count, length and mass data) or
- EM/Stereo: standardised datatables exported directly from EventMeasure observation files (.EMObs).
- Project must be chosen or defined by the user, e.g. Nagari Capes Marine Park (Figure 2)
- New Projects can be added and shared with any users clicking on “Projects” and then “Create a New Project”.
- Method/Gear must be chosen or defined by the user, e.g. stereo-BRUVs.
- New Method/Gear can be added, but note that specifics/modification of a “typical” sampling method can be added below if a modified sampling method is being used that already exists.
- Data files can be added by “Drag and Drop” and must include:
- Metadata file
- If EM/Stereo upload type is selected, data files must include:
- The nine standard datatables produced by the EM export function
- And may include any other files (e.g. habitat annotation files, a .zip containing (.EMObs or calibration files)
- If General upload type is selected, data files can include:
- any other files
-
Campaign Information on the specifics of sampling and annotation methods can be defined for the Campaign (see Adding Campaign Information, e.g. deployment time of BRUVs, transect size of DOVs, the software used for image analysis and availability of habitat annotation data).
- Click on the “Save!” button
- This will upload all the files to GlobalArchive but will not import them to the spatial database.
-
A new modal window will open (see below)
- To import the metadata to the spatial database and the Explore Map >Select “Import: deployments to DB”
- After importing you deployments download your MaxN file and scan for errors
- Select “Download: generated MaxN file
- Finally, check the spatial layout of your data for errors in latitude/longitude
- Click on the “Show on map” button below the picture Figure 4 Modal window showing data tables and files uploaded and options for importing data and queries.